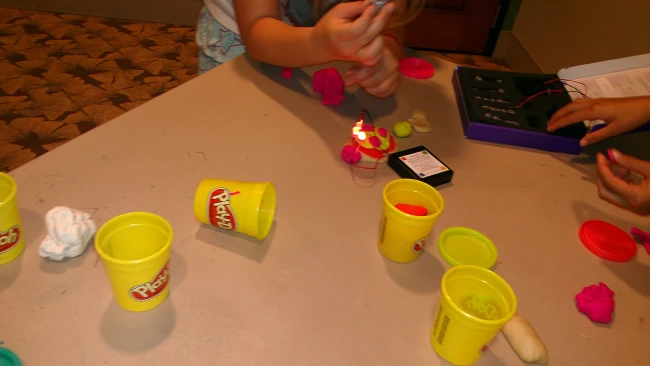
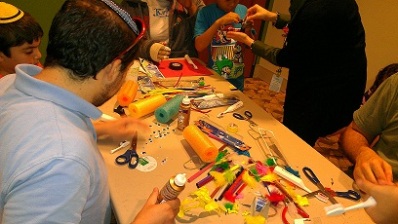
At our last Tinker meeting I shared two program ideas with the group, Squishy Circuits and Artbots. In case you missed the meeting or want a refresher here’s some helpful information on both.
Squishy Circuits
Squishy Circuits were developed at the Thomas Lab at St. Thomas University. On their website you can read all about Squishy Circuits, get programming ideas ranging from the basics to much more involved projects. Squishy Circuits are awesome because the kits aren’t too expensive ($25), and they can be used with youth of all ages. I’ve done Squishy Circuits programs with kids in kindergarten to 5th grade and have a program for teens planned for this fall. The resources provided on the website basically provide all the information you need to run your own program. Once you’re comfortable with the kits and the concepts then you can tweak the projects and come up with your own. For example at EPL we have the kids design a light up face or pizza with their kits. A few tips: playdough you buy at the store works for the conductive dough and watch our for the buzzers they can be painfully loud especially a room full of them 🙂
Artbots
I was fortunate enough to learn about artbots through a new program EPL was able to take part in over the spring and summer called Maker Corps. Maker Corps, was a new pilot program being offered by Maker Education Initiative, the non-profit branch of MAKE. I hosted 2 Maker Corps Members this summer and we all went through an 8 week development camp in the spring run by Maker Ed, which is where we were introduced to artbots.
There a lot of different ways to make artbots. The first one I made was with a solo cup, a motor and battery from a dollar store electric tooth brush, 3 markers and some tape. I used this website as a starting place when trying to get my artbot to work. After another Maker Corps Host Site posted pics from their artbots program I found out that pool noodles (which you can also get at the dollar store) work even better for artbots. They’re easier to work with and to decorate.
The hardest part of making an artbot is getting the motor and battery out of the toothbrush. I recommend removing the bottom and then banging it on the ground to get the motor and battery out. If you use pliers to pull everything out you risk stretching out the spring. Plus banging it on the ground is fun. Once you’ve pulled your motor and battery pack out you need to reassemble it. You’ll want to try and line up all the metal pieces on each section, then make sure your motor runs and then tape or rubber band it together. Then you mount it on your pool noodle, cup or whatever you want to use, add marker legs, decorate and then turn it on and see what it does (make sure to remove the marker caps). I especially like artbots because they a great program for all ages of youth and families. I think the program also encourages kid to be problem solver and innovators. This video from Sweden’s Museum of Science and Technology shows just some of the different approaches kids have taken when creating artbots.
If you have any questions or want more information feel free to email me at rneumeier@cityofevanston.org.
-Renee


[…] Bots: https://tinkergroup.wordpress.com/2013/09/16/squishy-circuits-and-artbots/. Make Art Bots using electric toothbrushes from the Dollar Store. Limit to the first 25 children. […]
[…] pool noodle, and markers. A colleague originally saw the Doodle Bot (called an artbot there) at a local networking meeting, and we adapted the design for simplicity’s […]